

Prerequisites
- Node.js 22 or later - check with
node --version - An AI coding client: Claude Code, Cursor, or Codex CLI
Overview
1
Create your account
Sign up at console.ironbee.ai.
2
Install the CLI
npm install -g @ironbee-ai/cli installs the ironbee command globally.3
Sign in
ironbee login connects the CLI to your account. One time per machine.4
Set up your project
cd into your project and run ironbee install to wire up your AI client.Step 1: Create your account
Go to console.ironbee.ai and sign up. If you already have an account, just sign in. Your account gives you access to the dashboard and is what the CLI connects to in the next steps.Step 2: Install the CLI
Install the CLI globally with npm:Step 3: Sign in
From any directory, run:If the browser doesn’t open automatically, the CLI prints a URL you can paste in manually. Running in CI with no browser? Use an account API key instead, see Authentication.
Step 4: Set up your project
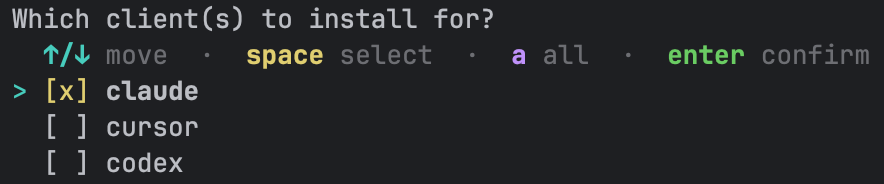
Navigate to the project you want to use IronBee with, then run the installer:a selects all, and Enter confirms (so you can set up several at once). When several were detected they come pre-checked; deselect any you don’t want.
assist(default): the verifier and/ironbee-verifyare installed so the agent can verify on demand, but nothing blocks task completion.enforce: changes must pass every active cycle before a task can complete. Enforce also asks how strict the gate is and whether a failed verification must be fixed.monitor: tracking only. Sessions, activity, and tool calls are recorded to the Collector; no verification machinery is installed.

monitor, which platforms to verify:
- Browser: on by default; covers most frontend work.
- Node, Python, Backend, Android, and Terminal: opt-in; enable any you want gated.
- Not sure which to pick? Press
sto let IronBee analyze your project with your AI client (Claude Code, Codex or Cursor) and suggest the set.


Restart your AI coding client after installing so it picks up the new setup.
What’s next?
Give your agent a task as you normally would. In assist mode, ask for a verification with/ironbee-verify when the change is ready. In enforce mode, IronBee has the agent verify the changes before the task can complete. Every session shows up in the Console.
How verification works
Understand the completion gate, cycles, and verdicts behind what you just set up.
Managing projects
Install, remove, update, and track IronBee across your projects.